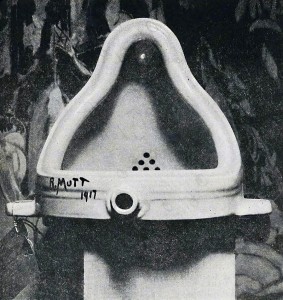
Marcel Duchamp’s “Fountain” is perhaps the most famous example of a piece that engendered the question, “Is it art?”
Perhaps you think that your art is not good enough to sell, or worse, maybe you are worried that what you are making isn’t even considered art at all. You look at what you have made and ask yourself, “Is it art?”. Well, if you meant for it to be art, then the answer is “Yes”.
First off, you may not be exactly sure what is and what is not art. Modern art has made it rather confusing. Now, technology also confuses the issue. I can’t tell you how often I have people dismiss my art as “not art” simply because I use a computer to make it.
For most of the era of modern art, ever since the impressionists deviated from the rules of the art academy, the question has been asked “is it art?” The response usually comes from someone who has an agenda: a collector who wants to increase the value of the art they own, a gallery owner trying to eliminate the competition, a politician trying to cancel public funding for the arts, even from the artist trying to justify their own body of work. The answers from these people tend to boil down to an attempt to narrow the field. They are trying to increase the importance of what they CONSIDER to be art at the expense of everything else.
So what is art? It’s anything made by a person that is considered to be art by that person or any other person. I know, it’s a bit of a cyclical definition, but that’s the truth of it. Art is what we say it is. That is not to say, though, that everything is art. Naturally concurring things are just that – things that happen to be there, and the vast majority of things made by people are just for utilitarian purposes, things that no one considers to be art; therefore, such things are not art.
So, if you think you are making art – you are. Don’t let anyone tell you otherwise.
However, just because it is art does not necessarily mean that it is likely to sell well, but we’ll get more into that later.
Daniel
P.S.
Note that I do limit the definition to things made by people. You might argue that there are a few animals capable of creating art, but quite often such art is really the result of a human trainer. Also, in the future, there may well be machine intelligences making art, but at this time, art created by machines is really done so by a person directing or programming the machine.
P.P.S.
Like what you just read? Subscribe to my newsletter and receive more more of my articles and enjoy my art while you’re at it 😀
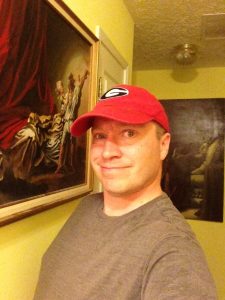
Okay, so you’ll see a picture of me in the first article posted in the blog. It’s part of my introduction, but it is also my first piece of advice: try not to be too anonymous. Art is not a typical product. Unlike toasters, televisions, or sofas, when people buy art, the person who made it can be as important to them as the art itself, if not more so. The Internet makes it easy to be anonymous, but for an artist, anonymity can be a turn off to potential collectors.
I’ve created numerous online galleries using names that hide my identity. Weather it was a company name, or a snappy online ID, my sales where always slow or non-existent. Once I started using my real identity though, the art sales started coming in much more often. Art buyers just seem reluctant to buy from someone like SuperArtist1973, but as “Daniel Eskridge, Artist” I become much more approachable.
Customers will not by from an artist who looks like this
Now you could create a believable psuedonym, that is, a first and last name that could be that of a real person, but I believe that there’s more to to using your real identity. I think that it has something to do with that once you attach you real self to your art, you are much more concerned about putting your best foot forward. Your art suddenly becomes a matter of pride, not just profit. You real reputation is on the line.
So use your real name for your online presence. Also, let people see you. Use real pictures of yourself for your online profiles on sites where you sell your art. Let your customers see that you are an actual human being.
Being a digital artist who uses FineArtAmerica (now called Pixels.com) I’m a bit biased, I prefer to use them…but I have tried getting my art printed from a few different places including Costco, Walmart, RedBubble, Staples, Snapfish, Zazzle, and Shutterfly.
For the most part, print quality is all the same between them, generally above average and perfectly acceptable to everyone who has ever bought a print from me. In fact, the word is that all of those print on demand sites actually use the same clearing houses to produce prints.
The only one of lesser quality was Walmart which was not THAT bad, but a little below what I would consider acceptable for a sale – though perfectly okay for my own personal prints. However, because they print on site at the store they are fast and less expensive.
If you want exceptional quality, then you need to look up your local professional giclee print house. They are generally quite expensive and you’ll have to go on word of mouth to know if they are any good.
I also owned my own Epson Stylus Pro 7600 for a time to print my own stuff. I would not recommend going that route. It was VERY expensive and very difficult to get quality prints.
In addition to being an artist, I worked my way through college in a frame shop.
My first suggestion would be to hire a professional framer to do it. Framing can actually be quite difficult, but, if you’re the do-it-yourself type:
First off, your painting needs to be stretched. Most likely it already is as canvases sold in art supply stores are sold prestretched on a wooden frame, but if it is not, I suggest you take your painting to a frame shop where you can have a professional do it. Stretching a painting is actually somewhat difficult and does require some practice and know-how.
Assuming you’ve gotten to the point of having the painting stretched, you need to find or build a frame that fits the dimensions of your painting. This is where oil paintings on canvas have a disadvantage over something like a photographic print or a painting on paper. You cannot use mats to alter the side ratios or increase the size of the work up to a larger frame. You have to have a frame that exactly fits your painting.
You can build a frame by ordering the frame moulding from any number of vendors then assembling with corner fasteners (usually provided by the vendor along with the moulding), or, if you are handy with carpentry, making your own with wood and house moulding from the local hardware store.
Oil paintings are generally not framed under glass.
It’s better to have frame that is deeper than the depth of the canvas’s stretcher bars, but it is not strictly necessary so long as the frame is wide enough so that no one will see the sides of the canvas from any reasonable viewing angel.
To mount the painting in the frame you can use metal canvas clips (even if the frame depth is less than the canvas depth), or, if the frame IS deeper than the canvas, you can use nails, brads, or staples partially sunk in the inside of the frame to hold the painting in.
Use two screw eyes 1/3 of the way from the top on the back of the frame as anchor points for the hanging wire.
Hanging wire is a braided metal wire that you can buy from just about any hardware store or big-box store. Be sure to get something that is rated with a weight strong enough for your painting.
Run the hanging wire through the screw eyes, then cut it leaving several inches on each side. You might want to wrap a bit of tape around the ends of the wire to prevent cuts. Bend the ends of the wire around the screw eyes then wrap them around the rest of the wire (the part between the screw eyes).
Perhaps you like my art, but just don’t have any wall space. Well…I have many other ways you can enjoy my art. For instance, you might want to have a coffee mug featuring my art, or a phone case, or a tote bag. They’re available in my Art Gift Shop!
One of the nice advantages of the fulfillment service that I use is that they offer much more than just wall prints. They also will print my art on a whole variety of gift objects. As such, I’ve just added a gift shop this site featuring some of those items.
Have you made any sales of your artworks through social networking sites like Facebook, twitter, pinterest, instagram?
My Fan Page on Facebook
This is a question I’ve gotten a couple of times.
Yes, I’ve made numerous sales through Facebook. To do so though, I have a fan page that I use to market my art. I would not recommend using a personal FB page to do your art business.
I’ve spent several years building a following on Facebook, and it has required lots of time and some money for advertising.
If you want to learn more on selling art through Facebook, check out my quick start guide to selling art online.
I’ve made a couple of sales through DeviantArt as well, but that site tends to be more social rather than commercial when it comes to art.
As for Twitter, I have a couple of thousand followers. Whenever I post art there for sale, I usually only get one or two click through’s to my website, and, if any of those pitiful few have ever converted to a sale, I didn’t catch it.
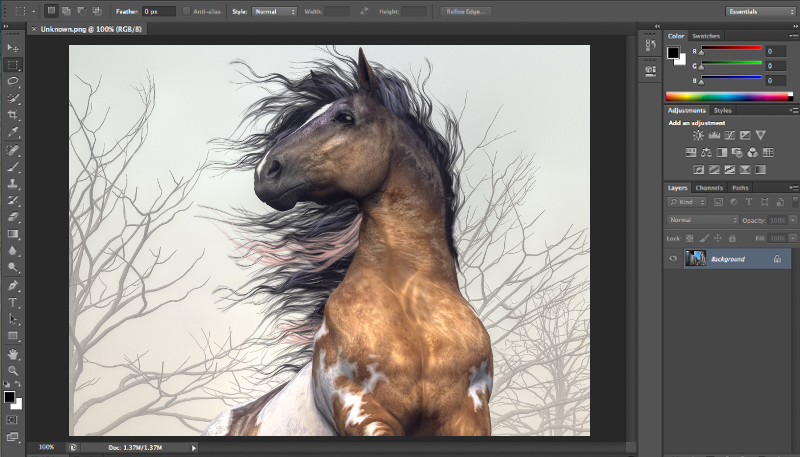
Photoshop is the single most powerful and most used computer application in the world for art and photography. Most people who have spent any time doing digital art or photography have used it. However, as you may be new to digital art, I’m going to introduce it as if you’ve never heard of it.
A image with a sepia tone filter applied using Photoshop
Photoshop is a digital image manipulation program, that is, it’s an image editor. You can do all sorts of things to an image as a whole with it, such as adjusting brightness, contrast, etc.; moreover, you can use it to apply various filters to image, for instance, giving an image a sepia tone. You can also edit parts of the image, such as painting on it with virtual brushes. In fact, you can create an entire digital painting with it. And, it works particularly well with tablets and styluses (I personally use it with a Wacom Bamboo).
Until I got into 3D rendering, Photoshop was all I needed for doing digital art. For several years, I needed nothing else. There is so much that you can do with Photoshop. There are so many books on how to use it that they could fill a library, classes you can take, and thousands upon thousands of Youtube videos on how to use it.
How to get it
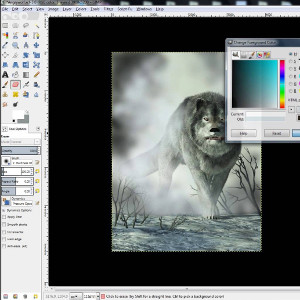
Photoshop with one of my images loaded.
For a long time, Photoshop was a rather expensive application that you had to buy at a place like Best Buy off the shelf. Later on, you could buy it online and download it, but even then, it cost hundreds of dollars. Now however, Adobe (the company that produces Photoshop) has made it available through a subscription model. That makes it way more comfortable to try out. As I write this, you can get a monthly subscription as low as 10 bucks a month.
Rendering, also called “digital rendering” or “3-D rendering” is a relatively new form of art made possible by the existence of computers. Essentially, it is the creation of two-dimensional artwork using a computer to generate an image. The artist creates virtual 3d models and sets up scenes using them. The computer then uses that description to simulate a 3D reality from which it takes a virtual snapshot. That snapshot can then be left in digital format or be printed out by the artist. This process is the same way companies like Pixar created movies, only I’m creating still images rather than animated scenes.
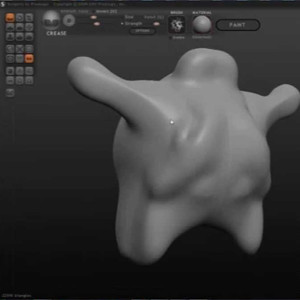
Modeling
Sculptris, a digital sculpting program.
The first step in creating 3D render art is the creation of a virtual model. This is analogous to sculpting a model from clay in the real world. The artist begins with a virtual lump of clay, often a sphere or cube, then molds model by stretching it, twisting it, and adding on to it. The process can get rather elaborate. Model making software can cost thousands of dollars, but there are some free applications, such as Blender 3D that are quite capable of producing high end models. A few such applications are:
A virtual model really only defines a shape. Generally, modeling software will let you define how the surface of that model appears (color, texture, reflectivity, etc.) but, more complex models call for skinning. Skinning is the process of creating of what is known as a UV Map. A UV Map is a special picture file that can be wrapped around a model to give it a surface. It’s sort of flattened version of the model analogous to the pattern one uses to cut material for clothing. Modeling software will help to create the UV Map, but I use image editing software, such as Photoshop or GIMP, to actually color in the UV Map.
Rigging
Certain complex models might call for something known as rigging. Rigging allows the artist to reposition certain parts of a model rather than having to remold a whole new one. For instance, if I create a model of a human form, I may want to be able to reuse that model in different poses. Rather than shaping a new model for every pose, I can rig a single model virtual skeleton. I assign groups of polygons to certain “bones” and then define how those bones can move in relation to one another. I use Blender3D for this. But other applications include Poser and Daz Studio.
Buying 3D Models
Sometimes, rather than making my own models, I will buy them. There is a community of 3D artists such as myself, and oftentimes, such artists will make their models available to others. Sites such as Daz3D.com and Renderosity.com offer a marketplace for both static and rigged models. Purchase of such models will include a license to commercially produce images using them. In effect, they become an art supply for producing images.
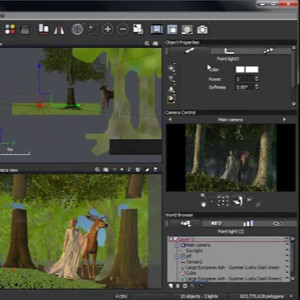
Layout
Vue a program for creating 3D enironments
The layout stage of rendering is where the artist defines the spatial relationships between objects in a scene. The objects are models created in the prior steps. This step also includes defining the light sources for the scene as well as atmospheric aspects of the image such a haze and fog.
Rendering
This is the step that is handled by the computer (or network of computers – called a render farm). The computer uses advanced mathematical algorithms to simulate the effects of the light and atmosphere upon the objects set up during the layout phase. This can take anywhere from a few minutes to many days depending upon the complexity of the screen. The final product is a CGI, computer generated image, usually in the form of a bitmap or JPEG file.
Post Production/Painting
Editing an image in GIMP
This is the part that would be more familiar to traditional artists. In the post production phase, the image is loaded into image editing software such as Photoshop, Corel Painter, or GIMP. The artist then makes adjustments to the image ranging from simple color changes to painting new parts.
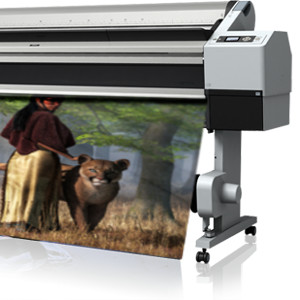
Printing
The final step in the rendering process is the production of the physical work of art. This is done by using any number of computer printers. They can be a simple standard inkjet printer printing on photo paper or monstrous wide format printer printing on canvas. I prefer the latter. High quality prints on canvas are often called giclées, though now, most places just call them canvas prints. This can also be outsourced to a commercial print-on-demand company.
If you’d like to see a high speed demonstration, here is an hour long session condensed into two minutes:
It’s a complex way to create art, involving skills of multiple artistic disciplines, but the results can be quite spectacular. It’s a form of creation that is new to the art world.
Would you like to know more about some of my art secrets and see lots of my art: sign up for my mailing list.
My name is Daniel Eskridge, and I’m an artist…at least I am some of the time. I have a day job as a software engineer. But in my spare time, I create art.
I grew up in north Georgia in the metro Atlanta area, and I live there now, north of the city a bit. I’m in my fifties, married, and have three kids.
I’m a classically trained artist in such formats as drawing, painting, sculpture and photography and have degrees in both art and computer science from the University of Georgia (Go Dawgs!).
For many years, I primarily did oil and acrylic paintings. However, being a software engineer by day, I’ve always been around computers and have was experimenting with digital as far back as the mid 1980’s. When my youngest son was born though, I decided to get the hazardous chemicals out of the house (which included all my oil paints), and I went all digital for many years. Lately, though, I’ve been returning to traditional materials and have been creating original oil pastel works.
I first started to like art when I was a kid. I read lots of science fiction and fantasy novels and was always fascinated by the cover illustrations. I first learned to make art by copying such artists as Larry Elmore, Keith Parkinson, Michael Whelan, Boris Vallejo and Frank Frazetta.
Naturally, my first genre of choice was fantasy, but over the years, I’ve branched into the paleoart, wildlife, cryptozoology, horror, and Western genres. I’ve also produced several non-genre realist works.
I spend a great deal of time outdoors, so nature and organic forms play a large role in my art. Particularly the place where I grew up (and still live), northern Georgia and the foothills of the southern Appalachians, inspires a lot of my work.
In 2022, I found myself an my family living out of a suitcase for a year and a half due to our house being significantly damaged in a plumbing mishap. Having a lot of time just sitting around in a hotel room, I decided to return (at least in part) to creating art using traditional methods. After experimenting with different media, I landed on using oil pastels. So, in addition to my digital work, collectors can now find some original oil pastels mixed in with my body of work: https://daniel-eskridge.pixels.com/collections/traditional+art+medium
Nowadays, I don’t have much time for contract work with a rather intense day job and a children in the house, but I do take the occasional commission if it fits. Plus, I still manage to create at least one new artwork per week — and if you want to hear about all of my latest works as well a see some of my favorites, subscribe to my email list.

 Okay, so you’ll see a picture of me in the


 Welcome to my website!