One feature you might find on your cell phone camera is the HDR setting. IPhones have had it for years, and I see that the latest Galaxy phones as well as Google Pixels have it, too. HDR stands for High Dynamic Range. What it does is that it gives a better range of color values in your pictures. For instance:
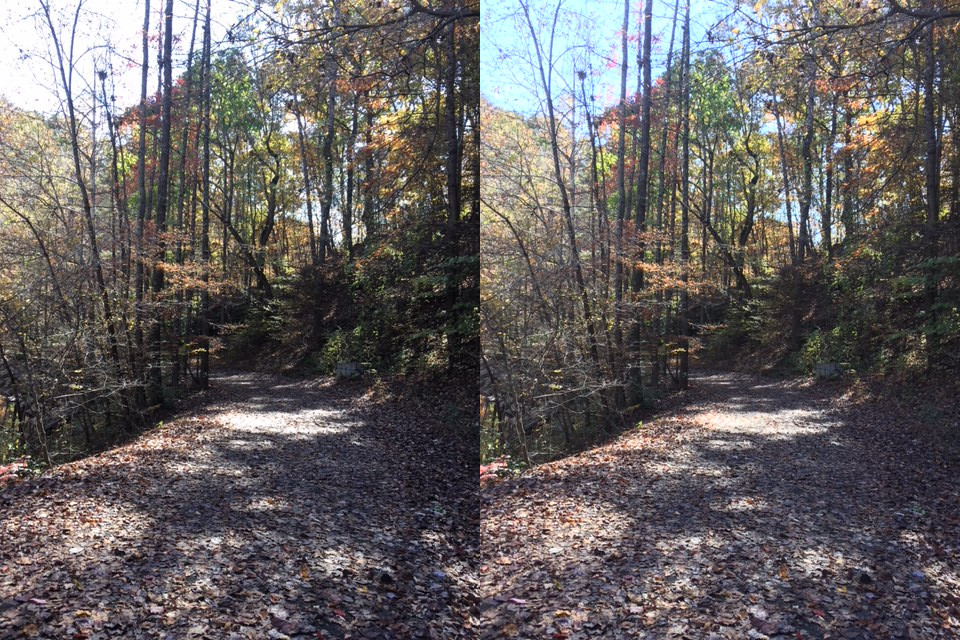
Two photos, one with the HDR setting enabled, the other without.
In this image that I took with my IPhone, I had the HDR setting enabled. It recorded both a regular image (left) and an HDR image (right). At first glance the two images look the same, but if you look at the sky, you’ll see that it was totally washed out in the regular image. Whereas, in the HDR image you’ll see that the blue of the sky has returned. If you look even closer you will see that the dark areas are a little less lost in shadow as well.
It’s a subtle change, but such small differences can make the difference between a good photograph and a great photograph.
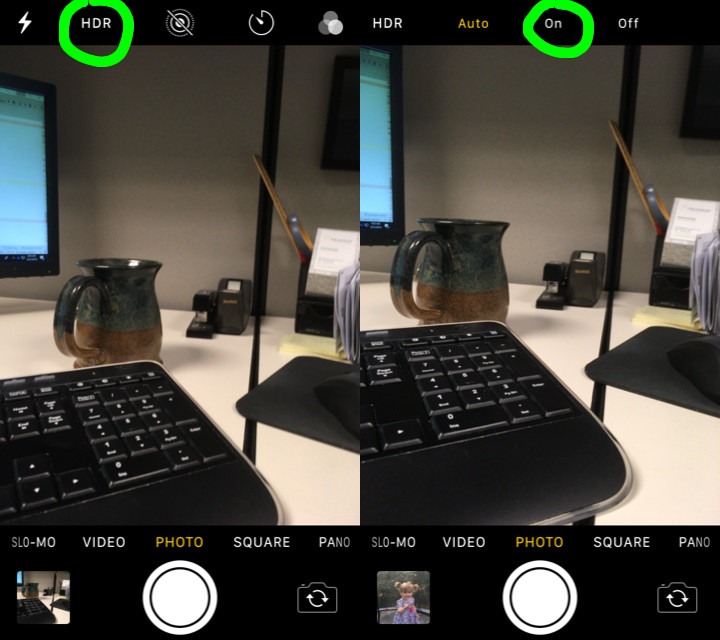
On IPhones, you enable the HDR setting directly in the camera app in two touches, first select “HDR” at the top or side (depending on the orientation, then select “On” :
Enabling HDR Setting on IPhone
You may have noticed the “Auto” option. That’s on newer IPhones and, in theory at least, has the IPhone determining when best to take an HDR photo. I tend to not trust the auto feature, and prefer to force the HDR setting to on.
There is one other setting on the IPhone involved with HDR. If you go into the Settings app and down to the camera settings, there is a toggle switch that you can enable to keep both an HDR and non-HDR version of any photos you take while the HDR setting is enabled. I suggest keeping this toggle on as sometimes, the non-HDR photo turns out to be the better of the the two.
Yours in Art,
Daniel
P.S. If you liked this article and don’t want to miss any future articles, please subscribe to my mailing list. I’ll send you all of my best art and articles.
In addition to being an artist, I worked my way through college in a frame shop.
My first suggestion would be to hire a professional framer to do it. Framing can actually be quite difficult, but, if you’re the do-it-yourself type:
First off, your painting needs to be stretched. Most likely it already is as canvases sold in art supply stores are sold prestretched on a wooden frame, but if it is not, I suggest you take your painting to a frame shop where you can have a professional do it. Stretching a painting is actually somewhat difficult and does require some practice and know-how.
Assuming you’ve gotten to the point of having the painting stretched, you need to find or build a frame that fits the dimensions of your painting. This is where oil paintings on canvas have a disadvantage over something like a photographic print or a painting on paper. You cannot use mats to alter the side ratios or increase the size of the work up to a larger frame. You have to have a frame that exactly fits your painting.
You can build a frame by ordering the frame moulding from any number of vendors then assembling with corner fasteners (usually provided by the vendor along with the moulding), or, if you are handy with carpentry, making your own with wood and house moulding from the local hardware store.
Oil paintings are generally not framed under glass.
It’s better to have frame that is deeper than the depth of the canvas’s stretcher bars, but it is not strictly necessary so long as the frame is wide enough so that no one will see the sides of the canvas from any reasonable viewing angel.
To mount the painting in the frame you can use metal canvas clips (even if the frame depth is less than the canvas depth), or, if the frame IS deeper than the canvas, you can use nails, brads, or staples partially sunk in the inside of the frame to hold the painting in.
Use two screw eyes 1/3 of the way from the top on the back of the frame as anchor points for the hanging wire.
Hanging wire is a braided metal wire that you can buy from just about any hardware store or big-box store. Be sure to get something that is rated with a weight strong enough for your painting.
Run the hanging wire through the screw eyes, then cut it leaving several inches on each side. You might want to wrap a bit of tape around the ends of the wire to prevent cuts. Bend the ends of the wire around the screw eyes then wrap them around the rest of the wire (the part between the screw eyes).
Rendering, also called “digital rendering” or “3-D rendering” is a relatively new form of art made possible by the existence of computers. Essentially, it is the creation of two-dimensional artwork using a computer to generate an image. The artist describes the scene in a way that the computer can understand. The computer then uses that description to simulate a 3D reality from which it takes a virtual snapshot. That snapshot can then be left in digital format or be printed out by the artist.
Modeling
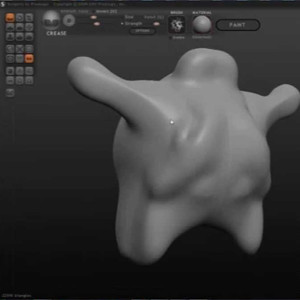
Sculptris, a digital sculpting program.
The first step in creating render art is the creation of a virtual model. This is analogous to sculpting a model from clay in the real world. The artist begins with a virtual lump of clay, often a sphere or cube, then molds model by stretching it, twisting it, and adding on to it. The process can get rather elaborate. Model making software can cost thousands of dollars, but there are some free applications, such as Blender 3D (which I use) that are quite capable of producing high end models. A few such applications are:
A virtual model really only defines a shape. Generally, modeling software will let you define how the surface of that model appears (color, texture, reflectivity, etc.) but, more complex models call for skinning. Skinning is the process of creating of what is known as a UV Map. A UV Map is a special picture file that can be wrapped around a model to give it a surface. It’s sort of flattened version of the model analogous to the pattern one uses to cut material for clothing. Modeling software will help to create the UV Map, but I use image editing software, such as Photoshop or GIMP, to actually color in the UV Map.
Rigging
Certain complex models might call for something known as rigging. Rigging allows the artist to reposition certain parts of a model rather than having to remold a whole new one. For instance, if I create a model of a human form, I may want to be able to reuse that model in different poses. Rather than shaping a new model for every pose, I can rig a single model virtual skeleton. I assign groups of polygons to certain “bones” and then define how those bones can move in relation to one another. I use Blender3D for this. But other applications include Poser and Daz Studio.
Buying 3D Models
Sometimes, rather than making my own models, I will buy them. There is a community of 3D artists such as myself, and oftentimes, such artists will make their models available to others. Sites such as Daz3D.com and Renderosity.com offer a marketplace for both static and rigged models. Purchase of such models will include a license to commercially produce images using them. In effect, they become an art supply for producing images.
Layout
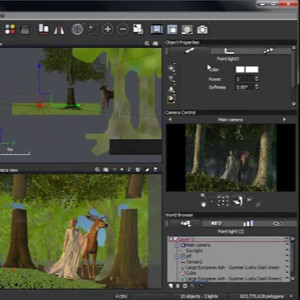
Vue a program for creating 3D enironments
The layout stage of rendering is where the artist defines the spatial relationships between objects in a scene. The objects are models created in the prior steps. This step also includes defining the light sources for the scene as well as atmospheric aspects of the image such a haze and fog.
Rendering
This is the step that is handled by the computer (or network of computers – called a render farm). The computer uses advanced mathematical algorithms to simulate the effects of the light and atmosphere upon the objects set up during the layout phase. This can take anywhere from a few minutes to many days depending upon the complexity of the screen. The final product is a CGI, computer generated image, usually in the form of a bitmap or JPEG file.
Post Production/Painting
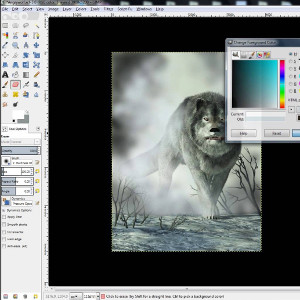
Editing an image in GIMP
This is the part that would be more familiar to traditional artists. In the post production phase, the image is loaded into image editing software such as Photoshop, Corel Painter, or GIMP. The artist then makes adjustments to the image ranging from simple color changes to painting new parts.
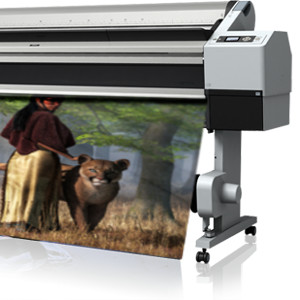
Printing
The final step in the rendering process is the production of the physical work of art. This is done by using any number of computer printers. They can be a simple standard inkjet printer printing on photo paper or monstrous wide format printer printing on canvas. I prefer the latter. High quality prints on canvas are often called giclées, though now, most places just call them canvas prints. This can also be outsourced to a commercial print-on-demand company.
If you’d like to see a high speed demonstration, here is an hour long session condensed into two minutes:
It’s a complex way to create art, involving skills of multiple artistic disciplines, but the results can be quite spectacular. It’s a form of creation that is new to the art world.
Would you like to know more about some of my art secrets and see lots of my art: sign up for my mailing list.